
Python #12
プログラミングに興味がある方はぜひUdemyでの学習がおすすめです!
JSONファイルをエクスポートする方法
1.まずはjsonライブラリをインポートします。
jsonライブラリはデフォルトで入っているのでライブラリのダウンロードは不要です。

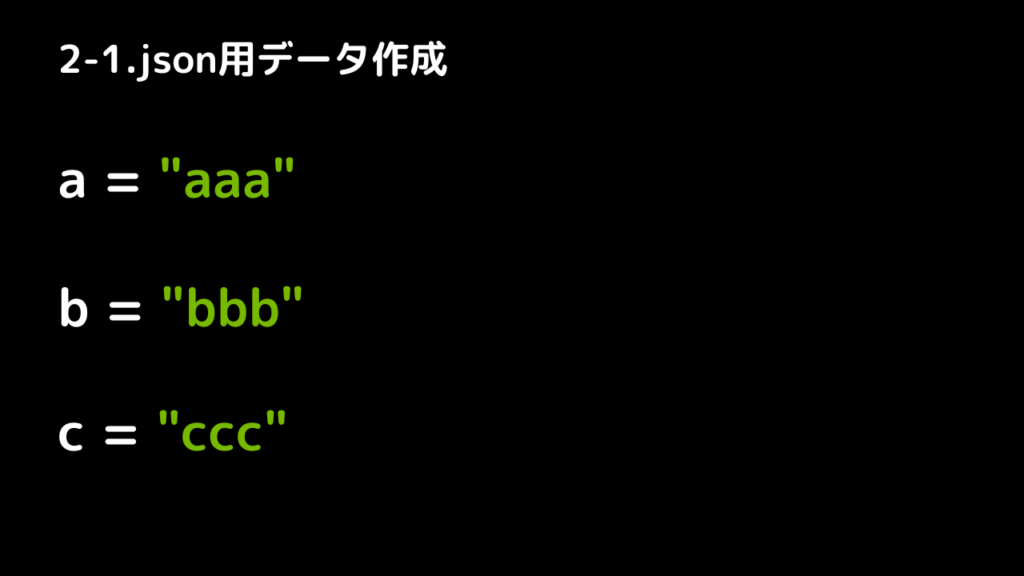
2-1.JSONで使用するための変数を作成します。これはしてもしなくてもどっちでもいいです。
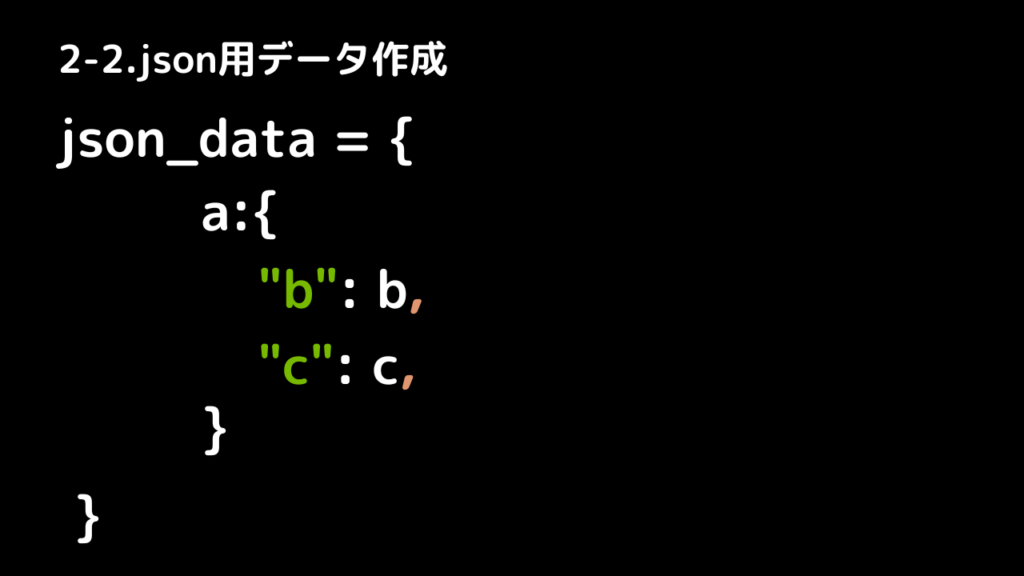
2-2.JSONに書き出す用の変数を作成します。
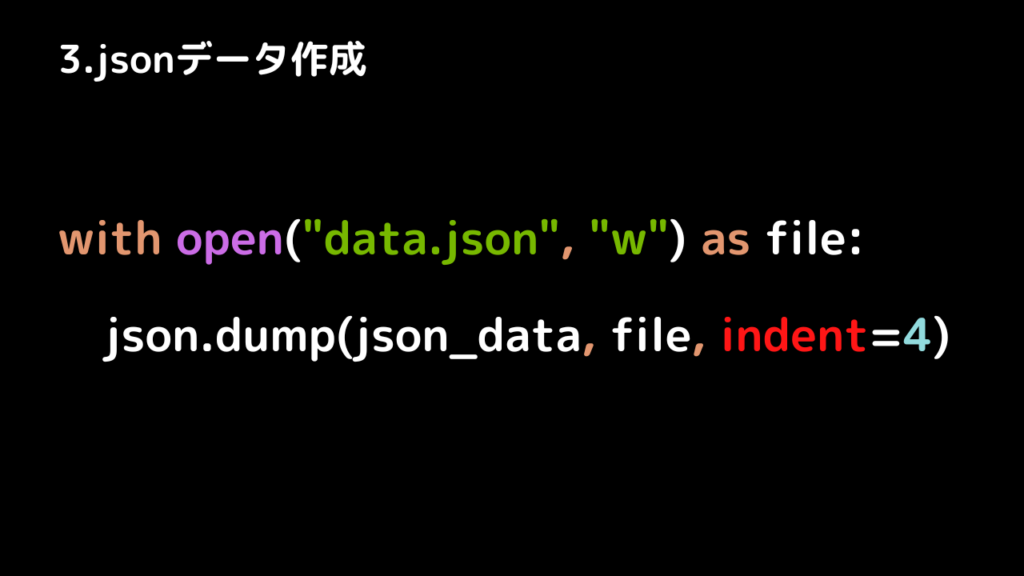
3.最後にJSONデータを書き出します。
出力されたJSONファイルが見やすくなるようにパラメータのindentに引数4を設定します。
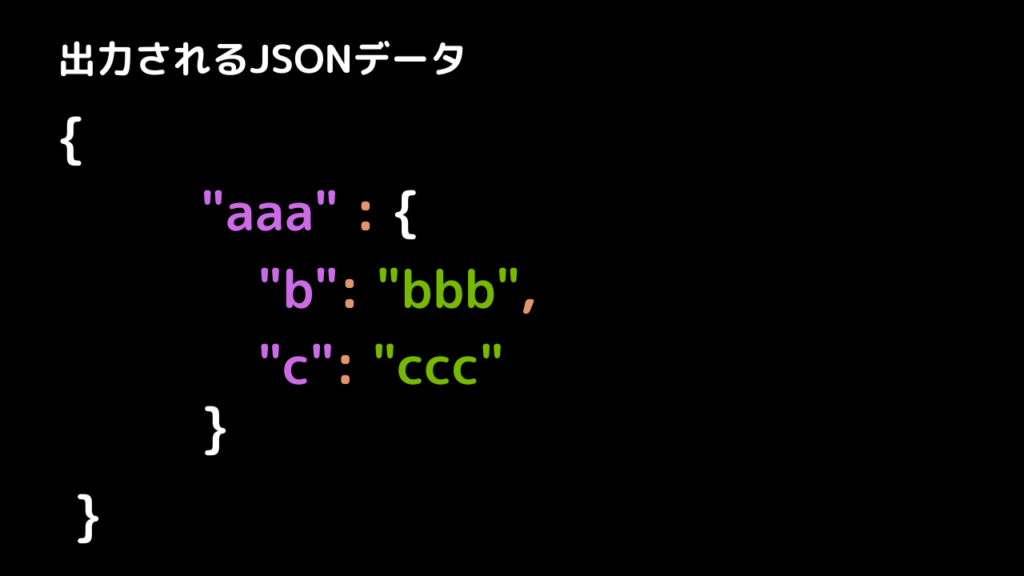
出力されるJSONデータは以下のようになります。
コード全文
import json

a = "aaa"
b = "bbb"
c = "ccc"

new_data = {
    a: {
        "b": b,
        "c": c,
    }
}

with open("data.json", "w") as file:
    json.dump(new_data, file, indent=4)
JSONデータを読み込む
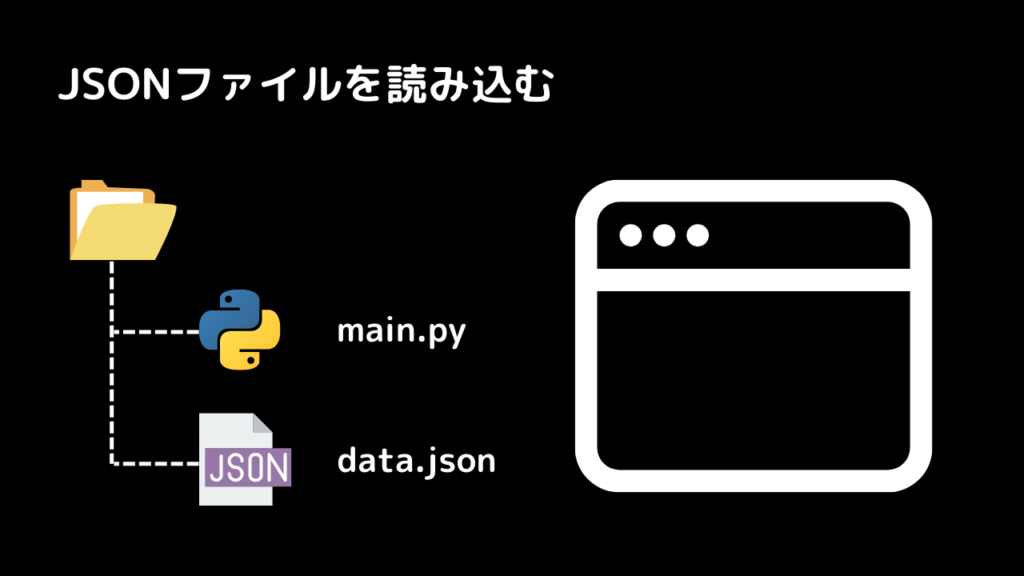
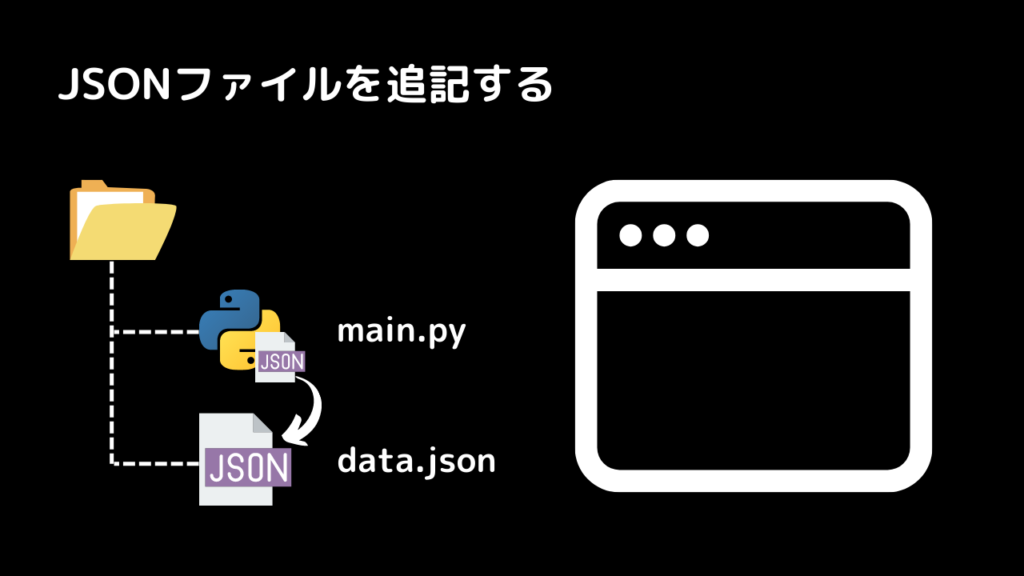
以下のようなファイル構成でJSONデータを読み込んでみたいと思います。
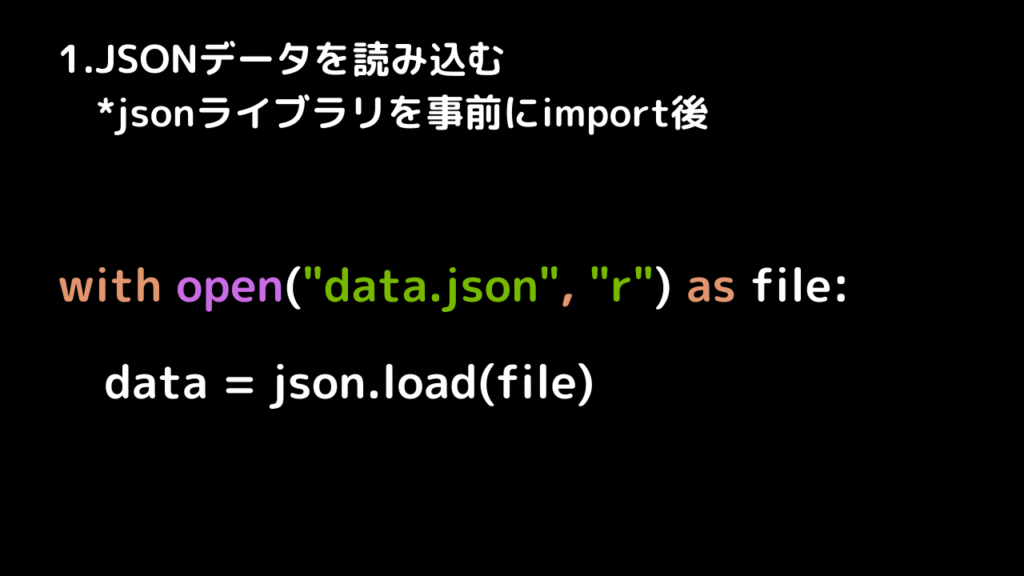
1. JSONデータを読み込みます。
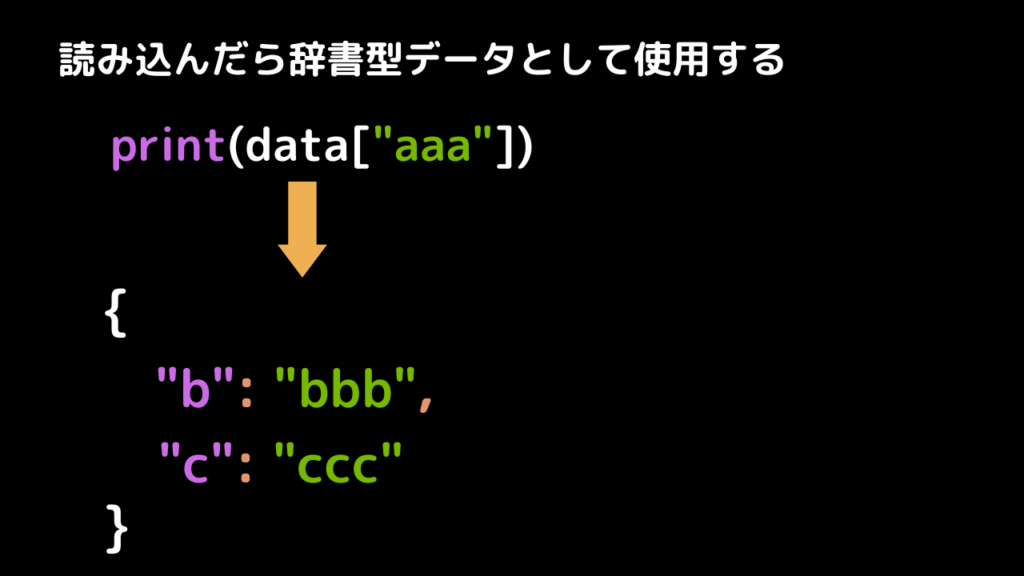
データの読み込みが出来たら辞書データとして扱えます
with open("data.json", "r") as file:
    data = json.load(file)
JSONデータを追加する方法
JSONファイルに追記する方法を見ていきたいと思います。
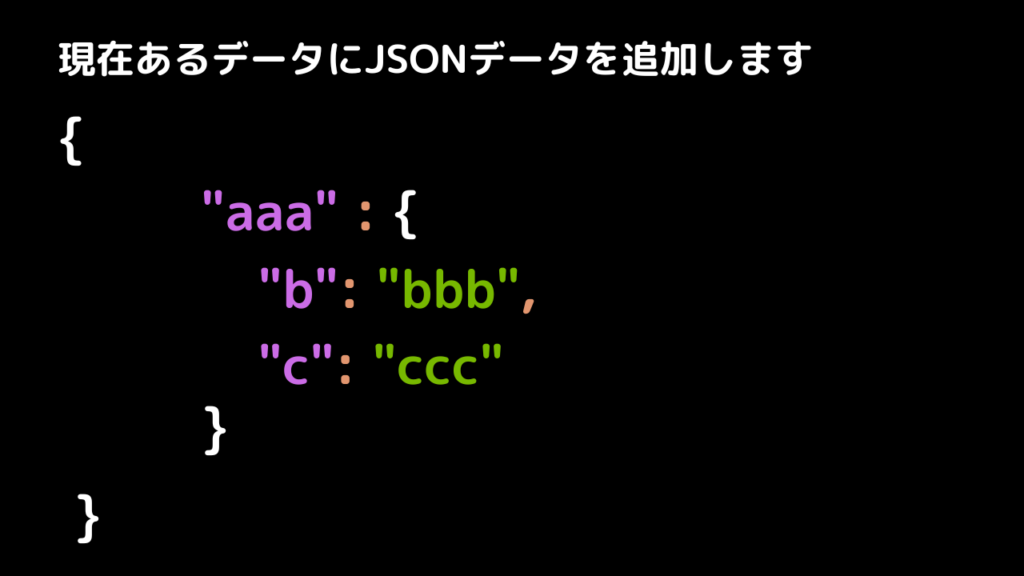
では現在のJSONデータの中身を確認したいと思います。
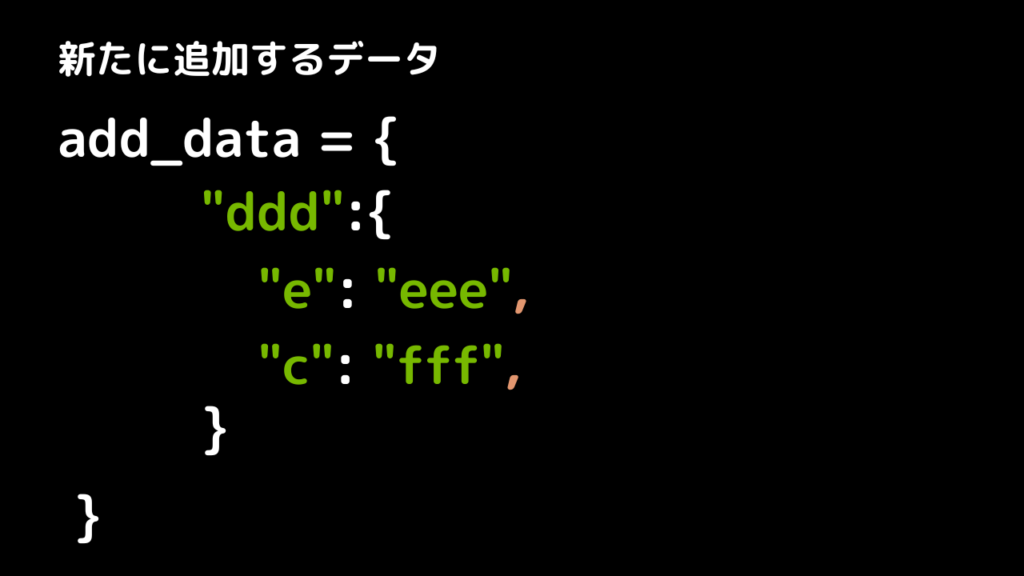
そして追加するデータは以下のデータです。
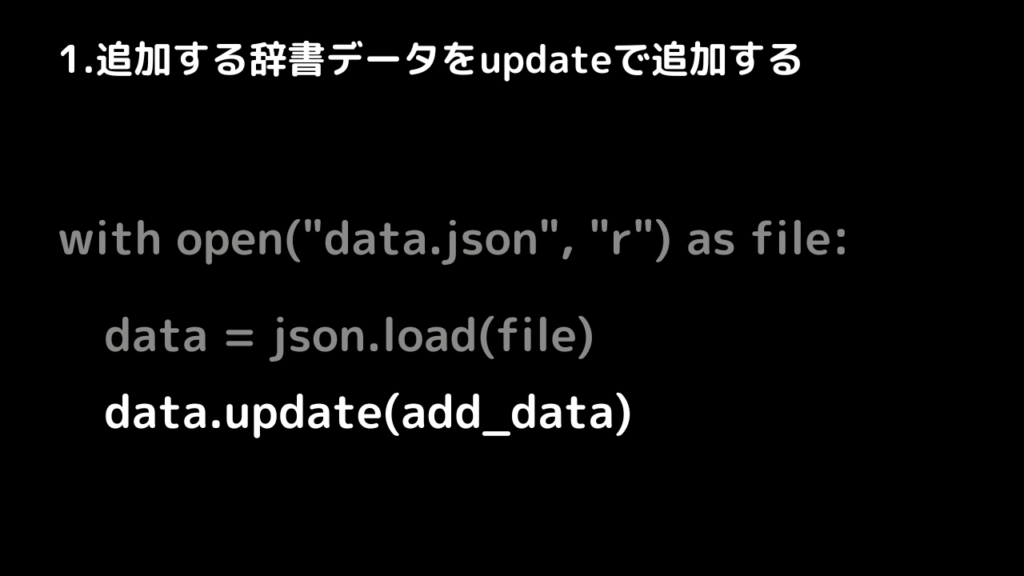
先ほどの手順でデータを読み込んだ後の作業として見ていきたいと思います。
- json.updateを使って読み込んだJSONデータに変数を追加します
2. 変数を出力する
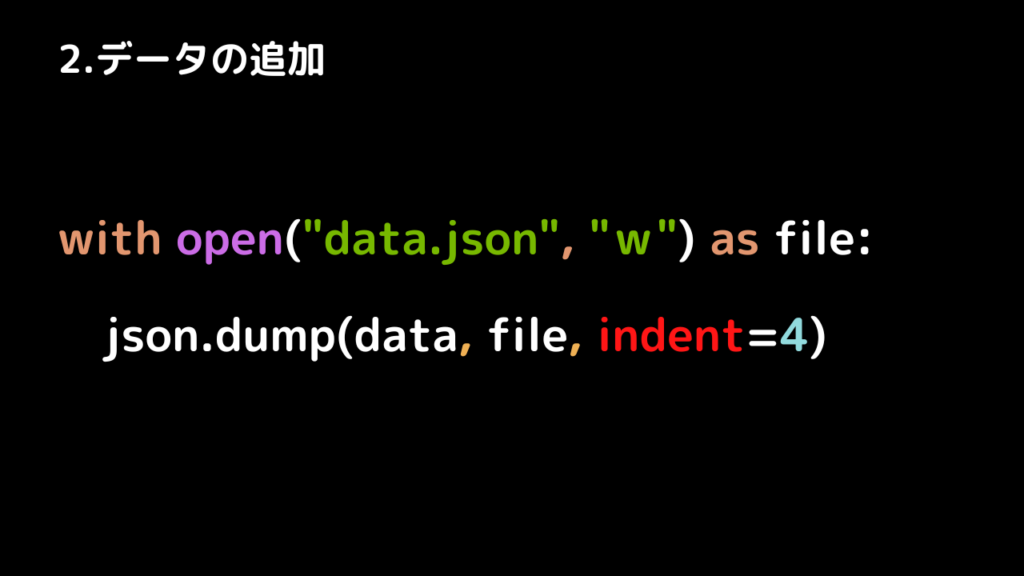
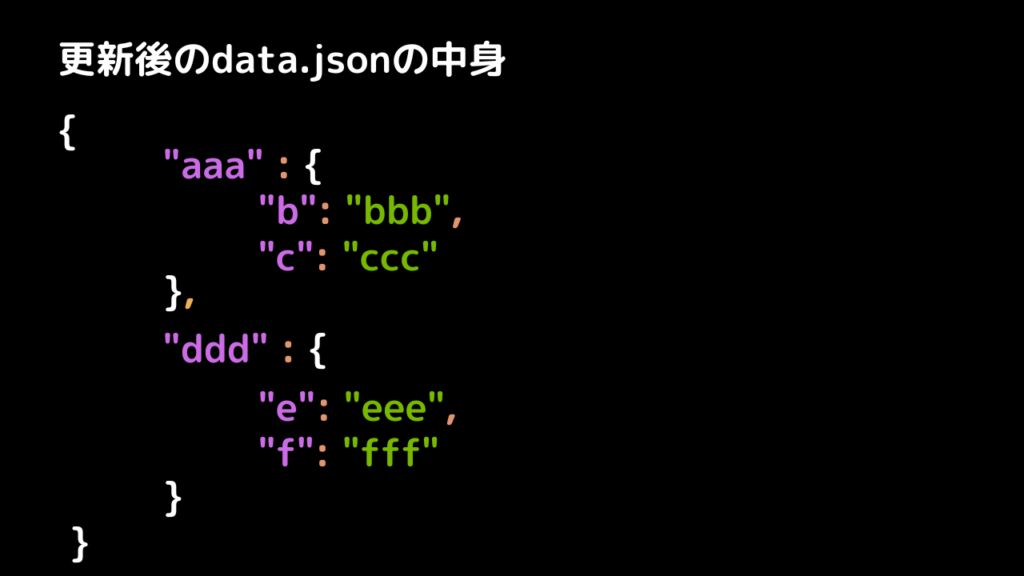
更新後のファイルの中身は以下のようになります。
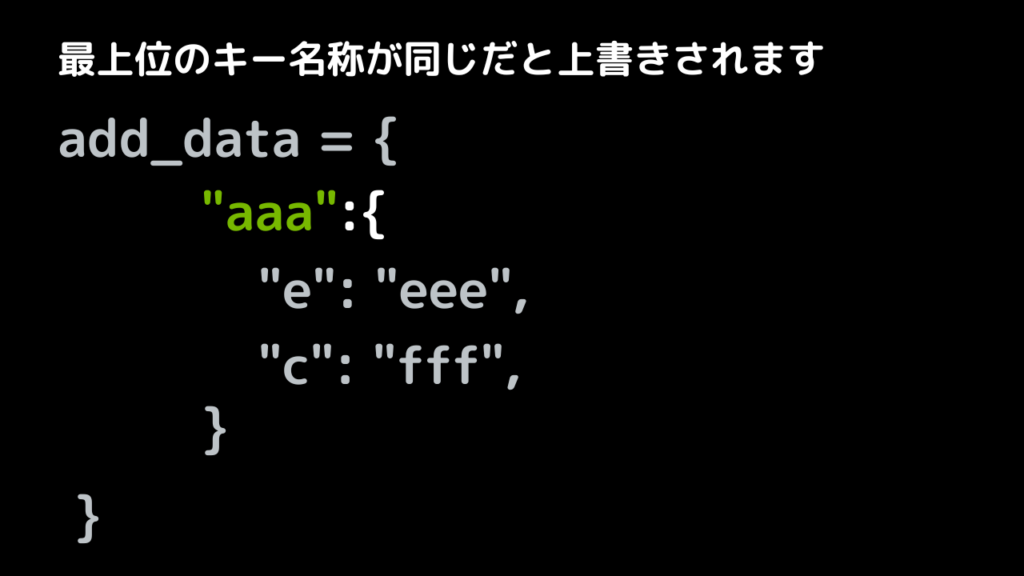
ちなみに、最上位のキー名称が一緒だと上書きされるので注意が必要です。
import json

add_data = {
    "ddd":{
        "e":"eee",
        "f":"fff"
    }
}

with open("data.json", "r") as file:
    data = json.load(file)
    data.update(add_data)

with open("data.json", "w") as file:
    json.dump(data, file, indent=4)
ぜひ参考にしてください!また!